Showing posts with label Workflow. Show all posts

18 Mar 2010

Upcoming talks and sessions

So I didn’t make it into DDD Scotland either, again the competition was fierce! Worried? Me? Not at all! I’ve currently got 3 sessions submitted to DDD South West! MUHAHAHAHAAA! As before I’ve submitted my intro to PRISM and intro to Workflow 4.0, but this time I’ve also added in a new Unity based session. So vote for me! I’ll get into DDD eventually! :D

In other news I’ve got a few talks lined up at the GL.NET and VBUG User Groups. The dates are:

24th May VBUG Portsmouth – Introduction to PRISM

5th June DDD South West – Hopefully I’ll get in!

16th June VBUG Bristol – Introduction To Workflow

? September GL.NET – Unity & IoC (link and better name to follow)

So what about NxtGenUG Southampton I hear you cry! Well we’ve got a cracking line up coming up over the coming months. Tonight we’ve got Neil Robbins coming down from the big smoke to do his talk on Document Databases.

Then on the 15th April we join in the UK Tech Days launch festivities with our own Richard Costal talking about Silverlight 4, and have a special guest from Microsoft joining us. Details to follow on the special guest!

On the 27th May we have all round Guru Liz Keogh joining us to talk about BDD. This should prove to be an excellent session, because if you have any examples you’d like Liz to apply BDD during the session then submit them to me via email me at JohnMc@NxtGenUG.net and she’ll select the best ones.

Then on 24th June we’ve got Phil Pursglove coming down to discuss Microsoft’s exciting new Velocity technology.

An absolutely cracking line up I’m sure you’re agree! In fact what are you waiting for?! Go register now! :D

7 Sept 2009

WF 4.0 - Part 2. The Flowchart Workflow & Designer

UPDATE – Now Beta 1 Friendly!

The following is based on Beta 1 of WF 4.0 and as such might change or be missing in futures releases.

In Part 1 of this series of articles on WF 4.0 we started by looking at the new Sequential Workflow Designer, and creating a basic Sequential Workflow that added greeted a User. In this second part we will be looking at the new Flowchart Workflow and its designer.

So whats a Flowchart Workflow?

The Flowchart Workflow is a new hybrid of the Sequential and State Machine Workflows that we are already familiar with from 3.x. Even though WF was designed to be extensible so that people could extend it with their own custom Workflows, Microsoft found that a very large percentage of their customers using WF were bending over backwards to crowbar their Workflows into either the Sequential or State Machine types when neither were appropriate. From this Microsoft identified the need for a hybrid type, and this is the result.

So what do you use it for? This is easier to follow if we define when you'd want to use a Sequential and State Machine Workflow first.

So when do you use a Sequential Workflow?

The Sequential Workflow is ideal when you want to model a process that has a defined start and end points and follows a defined (linear) path through a number of Activities. Here's an example:

As you can see even though we have branches in the Workflow, we always go through the same activities and end at our defined point. The Sequential is ideal for modelling Processes.

So when do you use a State Machine Workflow?

The State Machine Workflow is ideal when you want to model a process that doesn't have a defined path and could be one of many paths that will be taken through the Activities. A State Machine does not necessarily need an End Point. Here's an example we're all familiar with.

The State Machine was for Version Control, and as we all know there is no definite path as to how we perform our check in/check outs. One of the best uses for the State Machine Workflow is for Lifecycles of objects, where we have a defined number of States an object can be, in but the direction of state changes comes from an external source.

What about this new Flowchart Workflow?

So hopefully you've now got some idea as to what the original Workflows could do and where they might be used. We can now take a look at the Flowchart Workflow. One of the biggest differences between 3.x and 4.0 is that there is no longer any restriction on which kind of Workflow an Activity can be used on, so our Flowchart Workflow can use exactly the same activities as we did on the Sequential example.

So first off the designer.


As you can see we have the same features as before from the Sequential designer, but this time we have different rules as to how the Activities interact. First off we no longer get connections for free between activities. This is of course down to the nature of the Workflow type, as the designer can't guess what Activities we want to join together and how. So to join Activities together we select the start Activity and then drag one of the edge connectors to the target Activity's edge connector.


Again Variable and Arguments are used in exactly the same way as we did with the Sequential Designer. The Flowchart Workflow currently comes with 3 extra Items (not Activities) that allow us to add decision logic into the Workflow. The first is the FlowDecision which acts as a simple If statement in the logic.


This is actually a very simple Item to use, again dragging from either the green True connector or red False connector to another Activity will give you the path when either a True or False result comes from the Condition you set. The Condition is something that evaluates and returns a boolean result. So far I've been using things like VariableName.Equals("StringToMatch") for the condition. I suspect that in future releases this may have some sort of Expression Editor to it (but this is just my speculation).

The second new item is the FlowSwitch, and looks very similar to the FlowDecision.


OK, so lets put this altogether. I'm going to create a simple Workflow for Pizza management at User Group talks. It's going to ask us our location, if its the home region of Southampton then it'll tell me I need to order Pizza. If it's not Southampton, I'm doing a WF talk somewhere else so I remind the User Group leader. Then because I could in theory be doing a marathon number of talks in one day, it'll ask if my location has changed and if it has we go back to the beginning, otherwise the flow end.

Using the custom Readline and Writeline Activities that were also used on the Sequential Workflow, this is the result. For details as to how to bind to Variables and create them, see Part 1.


A screen cast with the construction of the Pizza Flowchart, will follow shortly.

In Part 3, we will be looking at creating a custom Activity.

20 Aug 2009

WF 4.0 - Part 1. The Sequential Designer

UPDATE – Now Beta 1 Friendly :)

This is the first in a number of articles that look at the new features in the WF 4.0, and as such the features might change or be missing in futures releases.

Windows Workflow Foundation 4.0 (WF), along with .NET 4.0 was announced at PDC 2008 and those present were lucky enough to get their hands on a VPC image. The Beta 1 VS2010 ISO is now available for download, you can get it from HERE.

So what's all the fuss about? Well put simply, WF as we know it has been given a complete overhaul from the ground up! They're rewritten the entire foundation and simplified it no end. WF is now far simpler to use and easier to extend. So in the coming series of articles I'll walk you through the new features showing how they differ to the 3.x version.

We're start off with the new Designers provided with WF 4.0. I can't show you the State Machine Designer, as it has been dropped from the 4.0 release. Instead we’ll be getting the Sequential Designer, and the new Flowchart Designer which is kind of a Sequential/State Machine hybrid.

Workflow Designers

The first thing you notice with the designers is that they are now written in WPF! This gives a whole host of advantages to the Designer experience, first off you get all the standard benefits of a WPF application (zooming, scaling, etc) but more importantly it is far more responsive that the old 3.x designer. This has a knock on effect on how you can use Activities on the designer, but we'll come onto that later. Lets have a look at the Sequential Designer.

The designer hasn't changed much from its transition to 3.x, you still insert activities in a vertical line onto it's surface. But what has changed are the addition of a couple of very small innocuous buttons in the bottom left of the designer called "Arguments" and "Variables".

Arguments are the method into which you pass values from the outside world into the Workflow you'll be executing, or from a Workflow into an Activity. Previously in 3.x to pass Arguments into a Workflow this meant dropping into code and adding a number of Dependency Properties in by hand.

So how do you add Arguments to a Workflow in 4.0? Easy, you click the Arguments button and add each Argument into the dialog that appears.

Give the Argument a name, select a Direction, a Type and if required a Default value. Once complete, you’ve created your first Argument.

As you can see, we have the choice of assigning a direction to the Arguments. This does exactly as you'd expect, so values are either taken In (like passing by reference), In Out (like passing by Value), Out (return a value) or as a Property.

But how do you actually get the Arguments into a Workflow? This hasn't changed at all, you still pass in a Dictionary with string keys for each of the values. The key relates to the name of the Argument it will be assigned to.

The Variables functionality is new in WF 4.0 and designer to solve a problem of complexity from 3.x. In 3.x you would have activities binding to each other, but this could lead to some very odd behaviour if the activities bound to the wrong activity and make things complex as an Activity could bind to another activity from either end of a Workflow.

So what the WF team introduced in 4.0 is the concept of variables within a Workflow. Instead of binding Activities to other Activities we now have a broker in the middle to hold the value. It sounds terrible and a bit like a global variable, but it does work very well and is only scoped to the parent Workflow or child Activity, so it's a lot more like Members in a Class. You could almost go as far to say the Workflow is now stateful, as it contains values that change as it executes.

So what does the Variables dialog look like?

To create a new Variable supply a Name, Type and if needed a default Value.

Ok, so what about when we change the context of the Workflow designer? What happens then? Well in that case the Variables window will show all of the Variables available to the selected Activity from the parent Activity (or Workflow) and above. Here you can see that the child Sequence Activity has 2 Variables available to it. AVariable owned by the parent Sequence Activity and it’s own AScopedVariable.

An important point to note here is the mechanism in which we bind Variables to Activities. Binding is now done via an Expression mechanism, so when you bind you can either bind straight to a Variable or alternatively you can enter a value in the box. So say I want to display "Hello" in the Write Activity instead of creating a variable to hold "Hello" and binding to that, I can put "Hello" with quotes straight into the Text property. This is because the property takes in an expression that can either be an explicit value or some sort of expression that can be a value assignment, or property call.

Create your first Sequential Workflow

The following is a textual version of the screencast.

Ok, so lets build a Sequential Workflow using these new features in a Console Application. This Sequential Workflow is going to greet a person we name. Now I'm going to be using a number of custom activities to perform the work, but I won't be going into how they work as this will be covered in a future article.

The process I'll be following is quite simple, the User will be welcomed and then prompted for their name and a greeting will then be displayed.

The first thing we need to do with our Workflow is to add in the Activities, so I'll add in a single WriteLine Activity that write text out to a Console, a custom ReadLine Activity that reads in from the Console, the Greeting activity. I do this in exactly the same manner as we add Activities currently, by dragging them onto the surface in the order I desire.

Now I'm going to need 1 variable for this activity. To hold the name input by the User. I click on the Variables button and add in 1 variable of type string called Name.

I can now assign the Name variable to the Read Activity I'm using to take in the input from the User. I do this by going to the Properties pane with the focus on the desired Activity and binding it to the relevant Variable.

Now I need to bind the input of the Greetings Activity to the Name Variable, I do this in the same manner as before.


If I now build the solution and run it. I get the following experience.

So lets have a look at the code it generated:

This is another important distinction in WF 4.0, there has been a move away from code (VB or C#) and towards declarative coding using XAML. As a rule, the only time you will ever write VB or C# is when you are writing you're very own custom Activities, the rest of the time you will be generating XAML. (Note :- The line that is cut off is just the path to the XAML file).

In the next article, I'll be looking at the new Flowchart Workflow and Designer.

13 Aug 2009

Slides for the Intro to WF 4.0 talk

I’ve uploaded the slides for my Windows Workflow Foundation 4.0 to my SkyDrive, you can get at them via this link.

Now includes code for the 5 basic demos.  Enjoy the coding goodness!

28 May 2009

WF 4 talk at the GL.NET User Group

I'll be doing a Windows Workflow Foundation 4 talk at the GL.NET User Group on the 12th August 2009.

The talk will be covering the Beta 1 release of VS2010 and Windows Workflow Foundation, unless Microsoft releases another Beta/Release Candidate by then ;). I'll be looking at the new features of WF 4.0 like the new Workflow Designers and the WPF based Activity functionality.

If you fancy coming along go here to register and I'll see you there!

17 May 2009

WF 4.0 Beta

So the Beta of WF 4.0 comes out for subscribers tomorrow, you can find more out here.

The WF series I’ve been writing will continue with the Beta, and parts 1, 2 and 3 will be updated.

Stay tuned for the rewrites and new articles :)

24 Apr 2009

Upcoming talks at Southampton & my talks around the country

Next month (14th May) I’m going to be doing a session on the PRISM (Composite WPF & Silverlight). This session will give an introduction to PRISM and give examples of how to use it various excellent features :) Further details and registration can be found here.

I then travel up to Birmingham on the 9th June to bring my PRISM talk to the Brum NxtGen crowd. Further details and registration can be found here. So if you miss the Southampton one in May, come on up to Brum!

On the 18th June we have our excellent friend Guy Smith-Ferrier coming down to do a talk on Internationalising Silverlight. Internationalisation is Guys speciality, so this should be an excellent talk! We’ve also hopefully got a members nugget! Further details and registration can be found here.

Then on the 16th July we complete our visits from the MS DPE team with Mike Ormond talking on ASP.NET 4.0. He’ll be covering such sexy things as AJAX.NET, MVC and Dynamic Data. An excellent speaker with an excellent topic, it should be cracking! Further details and registration can be found here.

In August I’ll be putting in an appearance at the Gloucestershire .Net User Group to do one of my Windows Workflow Foundation based talks. Date and detail to follow :)

31 Mar 2009

WF 4.0 – Part 3. Custom Composite Activities

The following is based on the PDC CTP of WF 4.0 and as such might change or be missing in futures releases.

In Parts 1 and 2 we looked at the different types of Workflow and their respective designers available in the CTP of WF 4.0. In the next couple of parts we will look at how we go about creating our own custom Activities.

As previously mentioned, there has been a shift in the way we create and implement our Workflows. We no longer need to write C# to create a workflow, instead we use XAML. This is also true for Activities, as there are 2 kinds of Activities we can create in WF 4.0 which are Composite and Workflow Elements.

The Composite Activity is built up from other Activities and uses one of the Workflow types as it’s basis. This is a change in the way we think about Workflows, in 3.x we saw Workflows as containers that could only contain Activities, now Workflows can contain Workflows which contain Workflows etc. This new approach will allow us to capture and declare far more complex Processes and State Machines than in 3.x.

Composite Activities

So lets start by creating a Composite Activity. In this example we’re going to create a new Activity that is going to be used in the theoretical process of a User Group member arriving at a meeting and signing in. The Activity will basically be in charge of asking them there name, some sort of password and saying hello to them.

So first off we create a new Blank Activity and its designer is displayed. At this point we can either add in a single existing Activity or a Workflow.

Because my Activity is essentially making decisions, I am going to add a FlowChart Workflow to be the basis of my new Activity, this will allow me to add multiple Activities that will execute in a specific order.

Now the steps needed to perform our activity are as follows:

  1. Greet the User
  2. Ask for their confirmation code (given to them when they registered)
  3. Depending on whether the code is valid
    1. Welcome the user
    2. Give them another attempt to register

Now this Workflow is actually going to loop forever until a valid code is input, but in real life we’d give the user some sort of option to give up.

I’m going to be using our old friends the WriteConsole and ReadConsole Activities for this, as well as a new custom activity that checks the Users input against a confirmation code. The process is exactly the same as creating a Workflow, I drag the Activities on I want to use and connect them together. This leaves me with an Activity that looks like this:

Here are Variables and Arguments:

So what does the XAML look like for this?


   1: <p:Activity x:Class="DemoChart.GreetingActivity" xmlns:c="clr-namespace:CustomActivities;assembly=CustomActivities" xmlns:p="http://schemas.microsoft.com/netfx/2009/xaml/workflowmodel" xmlns:p1="http://schemas.microsoft.com/netfx/2008/xaml/schema" xmlns:p2="http://schemas.microsoft.com/xps/2005/06" xmlns:scg="clr-namespace:System.Collections.Generic;assembly=mscorlib" xmlns:swd="clr-namespace:System.WorkflowModel.Debugger;assembly=System.WorkflowModel" xmlns:swdv="clr-namespace:System.WorkflowModel.Design.View;assembly=System.WorkflowModel.Design" xmlns:swdx="clr-namespace:System.WorkflowModel.Design.Xaml;assembly=System.WorkflowModel.Design" xmlns:x="http://schemas.microsoft.com/winfx/2006/xaml" xmlns:x2="http://schemas.microsoft.com/netfx/2008/xaml">
   2:   <p1:SchemaType.Members>
   3:     <p1:SchemaProperty Name="AttendeeName" Type="p:InArgument(p1:String)" />
   4:   </p1:SchemaType.Members>
   5:   <p:Flowchart DisplayName="Flowchart" swd:XamlDebuggerXmlReader.FileName="C:\Users\Administrator\Documents\Visual Studio 10\Projects\1_Designer_Demo\DemoChart\GreetingActivity.xaml">
   6:     <p:Flowchart.Variables>
   7:       <p:Variable x:TypeArguments="p1:Int32" Name="_attendeeCode" />
   8:       <p:Variable x:TypeArguments="p1:Boolean" Default="[False]" Name="_codeValid" />
   9:     </p:Flowchart.Variables>
  10:     <p:FlowStep>
  11:       <p:FlowStep.Action>
  12:         <c:WriteLine DisplayName="GreetAttendee" Text="[String.Concat(&quot;Welcome &quot;, AttendeeName)]">
  13:           <swdv:WorkflowViewStateService.ViewState>
  14:             <scg:Dictionary x:TypeArguments="p1:String, p1:Object">
  15:               <p2:Point x:Key="ShapeLocation">160,82.02</p2:Point>
  16:               <p2:Size x:Key="ShapeSize">160,35.96</p2:Size>
  17:             </scg:Dictionary>
  18:           </swdv:WorkflowViewStateService.ViewState>
  19:         </c:WriteLine>
  20:       </p:FlowStep.Action>
  21:       <swdv:WorkflowViewStateService.ViewState>
  22:         <scg:Dictionary x:TypeArguments="p1:String, p1:Object">
  23:           <p2:PointCollection x:Key="PolylineLocation">240,117.98 240,142.02</p2:PointCollection>
  24:         </scg:Dictionary>
  25:       </swdv:WorkflowViewStateService.ViewState>
  26:       <p:FlowStep x:Name="__ Reference ID 0">
  27:         <p:FlowStep.Action>
  28:           <c:WriteLine DisplayName="RequestMeetingCode" Text="[&quot;Please enter your metting confirmation code&quot;]">
  29:             <swdv:WorkflowViewStateService.ViewState>
  30:               <scg:Dictionary x:TypeArguments="p1:String, p1:Object">
  31:                 <p2:Point x:Key="ShapeLocation">160,142.02</p2:Point>
  32:                 <p2:Size x:Key="ShapeSize">160,35.96</p2:Size>
  33:               </scg:Dictionary>
  34:             </swdv:WorkflowViewStateService.ViewState>
  35:           </c:WriteLine>
  36:         </p:FlowStep.Action>
  37:         <swdv:WorkflowViewStateService.ViewState>
  38:           <scg:Dictionary x:TypeArguments="p1:String, p1:Object">
  39:             <p2:PointCollection x:Key="PolylineLocation">240,177.98 240,222.02</p2:PointCollection>
  40:           </scg:Dictionary>
  41:         </swdv:WorkflowViewStateService.ViewState>
  42:         <p:FlowStep x:Name="__ Reference ID 1">
  43:           <p:FlowStep.Action>
  44:             <c:ReadLine DisplayName="GetAttendeeCode" outArgument="[_attendeeCode]">
  45:               <swdv:WorkflowViewStateService.ViewState>
  46:                 <scg:Dictionary x:TypeArguments="p1:String, p1:Object">
  47:                   <p2:Point x:Key="ShapeLocation">160,222.02</p2:Point>
  48:                   <p2:Size x:Key="ShapeSize">160,35.96</p2:Size>
  49:                 </scg:Dictionary>
  50:               </swdv:WorkflowViewStateService.ViewState>
  51:             </c:ReadLine>
  52:           </p:FlowStep.Action>
  53:           <swdv:WorkflowViewStateService.ViewState>
  54:             <scg:Dictionary x:TypeArguments="p1:String, p1:Object">
  55:               <p2:PointCollection x:Key="PolylineLocation">240,257.98 240,282.02</p2:PointCollection>
  56:             </scg:Dictionary>
  57:           </swdv:WorkflowViewStateService.ViewState>
  58:           <p:FlowStep x:Name="__ Reference ID 2">
  59:             <p:FlowStep.Action>
  60:               <c:CodeCheck CodeToCheck="[_attendeeCode]" IsValid="[_codeValid]">
  61:                 <swdv:WorkflowViewStateService.ViewState>
  62:                   <scg:Dictionary x:TypeArguments="p1:String, p1:Object">
  63:                     <p2:Point x:Key="ShapeLocation">160,282.02</p2:Point>
  64:                     <p2:Size x:Key="ShapeSize">160,35.96</p2:Size>
  65:                   </scg:Dictionary>
  66:                 </swdv:WorkflowViewStateService.ViewState>
  67:               </c:CodeCheck>
  68:             </p:FlowStep.Action>
  69:             <swdv:WorkflowViewStateService.ViewState>
  70:               <scg:Dictionary x:TypeArguments="p1:String, p1:Object">
  71:                 <p2:PointCollection x:Key="PolylineLocation">240,317.98 240,350</p2:PointCollection>
  72:               </scg:Dictionary>
  73:             </swdv:WorkflowViewStateService.ViewState>
  74:             <p:FlowDecision False="{x2:Reference Name=&quot;__ Reference ID 0&quot;}" x:Name="__ Reference ID 3" Condition="[_codeValid]">
  75:               <p:FlowDecision.True>
  76:                 <p:FlowStep x:Name="__ Reference ID 4">
  77:                   <p:FlowStep.Action>
  78:                     <c:WriteLine DisplayName="Thanks" Text="[&quot;Thanks for coming!&quot;]">
  79:                       <swdv:WorkflowViewStateService.ViewState>
  80:                         <scg:Dictionary x:TypeArguments="p1:String, p1:Object">
  81:                           <p2:Point x:Key="ShapeLocation">20,462.02</p2:Point>
  82:                           <p2:Size x:Key="ShapeSize">160,35.96</p2:Size>
  83:                         </scg:Dictionary>
  84:                       </swdv:WorkflowViewStateService.ViewState>
  85:                     </c:WriteLine>
  86:                   </p:FlowStep.Action>
  87:                 </p:FlowStep>
  88:               </p:FlowDecision.True>
  89:               <swdv:WorkflowViewStateService.ViewState>
  90:                 <scg:Dictionary x:TypeArguments="p1:String, p1:Object">
  91:                   <p2:Point x:Key="ShapeLocation">210,350</p2:Point>
  92:                   <p2:Size x:Key="ShapeSize">60,60</p2:Size>
  93:                   <p2:PointCollection x:Key="TruePolylineLocation">210,380 100,380 100,462.02</p2:PointCollection>
  94:                   <p2:PointCollection x:Key="FalsePolylineLocation">270,380 398.5,380 398.5,160 320,160</p2:PointCollection>
  95:                 </scg:Dictionary>
  96:               </swdv:WorkflowViewStateService.ViewState>
  97:             </p:FlowDecision>
  98:           </p:FlowStep>
  99:         </p:FlowStep>
 100:       </p:FlowStep>
 101:     </p:FlowStep>
 102:     <x2:Reference Name="__ Reference ID 1" />
 103:     <x2:Reference Name="__ Reference ID 0" />
 104:     <x2:Reference Name="__ Reference ID 2" />
 105:     <x2:Reference Name="__ Reference ID 3" />
 106:     <x2:Reference Name="__ Reference ID 4" />
 107:   </p:Flowchart>
 108: </p:Activity>


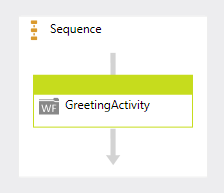
As you can see that’s a fairly comprehensive bit of XAML, which is understandable as there is no code behind anywhere in this Workflow. We can now use this Activity on a Workflow, and this is what it will look like.And if we look at the Properties for the placed Activity, we can see our AttendeeName argument that we added to allow us to greet individuals by name.

As this is an InArgument, it allows for expression binding. Had we used just a plain String property on there, we would not be able to use the expression functionality.

In the next part, we will look at creating our own custom Activities in code (items called Workflow Elements) and how to skin them.

5 Mar 2009

WF 4.0 - Part 2. The Flowchart Workflow & Designer

Replaced with an updated post here.

WF 4.0 - Part 1. The Sequential Designer

This has now been superceeded by This Post

2 Mar 2009

Back from roaming around Italy

I've just a very pleasant 2 week roaming around Italy with my wife :) The whole point of going was to do a course in Lampwork Bead making in Florence run by Tim and Lily at Beaded Lilly Glass Works. They were absolutley top hosts and I'd thoroughly recommend anyone interested in learning lampwork beads to go out to them :) This is all part of a grand plan for my wife to start up her own Lampwork Bead emporium, the website should be up at the end of the month on www.BatfishBeads.com.

This is us making beads

In other random unrelated news Xbox Live arcade went and released two of my favourite games while I was away. The first will need no introduction as everyone know it as the best shmup ever, that's right R-Type Dimensions. These are two games I've been trying to track down for years for my Arcade Machine but they always seem to come up when things are tight, so this release should sate my appitite for the time being :)

The other game was a complete outsider. Way back in my college days a craze swept my course for a game called Scorched Earth. It took place on a randomly generated landscape with tanks randomly placed on it which each player controlled. The idea was to kill everyone else on the map and be the survivor. You got cash for each kill and could bigger and better weapons, from dirt mobs which covered your opponents and they had to dig out, to Nuke which obliterated half the map. It was good fun and passed the lunchtimes quickly :) Anywho, XBox Live have just released what looks like a remake of it and it's called Death Tank. I've tried the trial and it's cracking, the number of weapons was more limited but that could be just the trial... Anywho, go check it out, it's an excellent party game :D

Workflow, in the next couple of days I'm going to start posting a series of articles on WF 4.0. I'll start off with the creating a new custom activity and work my way up from there. So keep posted for more information. These articles will be based on the PDC build, so I'll update them when the Beta becomes available :)

6 Feb 2009

DDD SouthWest sessions

I've just submitted 2 sessions for DDD South West, one on WF 4.0 which will be a variant on what I'm presenting at Guy Smith Ferriers Dot Net Dev Net group next Tuesday. Here's the blurb:

A lap around WF 4.0

WF 4.0 was announced at PDC 08, and includes some very sexy new features. We'll take a spin through some of the new features including custom activity creation and WCF intergration to see how WF has evolved.

The second is on PRISM which will be completely new and shiny for DDD South West. Here's the blurb:

Come see my PRISM-tation

PRISM is the latest incarnation of the Composite Application Guidance from the MS Patterns and Practices team. The guidance allows you to build extensible application quickly and easily in either WPF or Silverlight. In this session I'll show you how easy it is to build a WPF application and then extend it with PRISM.

Hopefully one of them will get accepted :)

: UPDATE :

My wife has very kindly pointed out that this is actually our wedding anniversary and her 30th B'day weekend. OOPS! So I won't be going, thank god I didn't forget otherwise that would be really stereotypical and embarrassing! :P